How We Use Mystery of History
One of the things I love about Mystery of History is its predictable weekly routine. Lesson planning is greatly simplified because each week follows the same basic pattern. (Read my review here.)
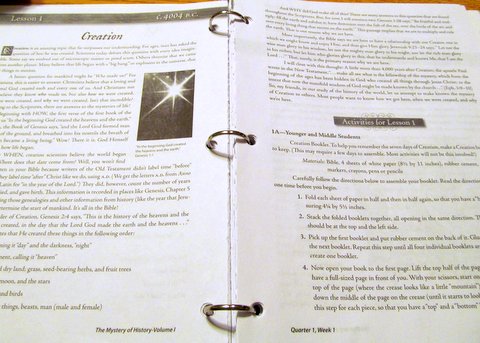
Mystery of History: Weekly Activities
- Pretest–an ungraded learning activity designed to spark the student’s interest in the next few lessons
- Three lessons–each lesson covers one person or event with a reading selection and activities for three different levels
- Memory cards–small summaries for each lesson are written on index cards for weekly review
- Review activities–people and events from the week’s lessons are added to the timeline, and related mapwork is completed
- Cumulative review–either a quiz or a worksheet that covers all material studied from the beginning of the course
So how does this look in a real homeschool week? Join us for a look at our first week of Mystery of History!
How We Use Mystery of History
Day One
Day One should begin with a pretest, which introduces the week’s lessons and builds the student’s interest. However, we rarely fit these into our schedule. Although I’m certain the pretests would be beneficial, I don’t believe they are absolutely essential. On to the lesson . . .
Kaylee and Keaton each read the day’s lesson individually. I had originally dreamed of reading the lessons aloud together, but both Kaylee and Keaton are avid readers and prefer to read and process information on their own.

After completing the reading, the children have the option of completing a related activity. Each lesson has a fabulous list of projects for younger, middle, and older students. These are not just “filler” or “busy work,” but real learning activities. Younger students generally have a hands-on project, while older students may do extra reading or research for a writing assignment.
While most families love Mystery of History’s wonderful activities, my children actually disdain hands-on anything. They would much rather read for hours than dig into a creative project. So while I’m a little disappointed that they aren’t interested in all the fun activities Mystery of History offers, I love that I can adapt the course to fit their learning style.

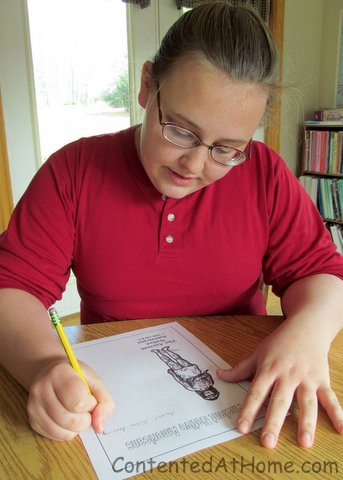
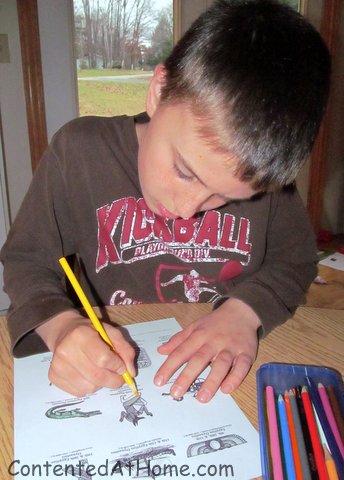
Instead of doing the suggested activities at the end of the lesson, Kaylee and Keaton complete a notebooking page about what they have learned. I also have plenty of related historical fiction and non-fiction books for them to read as a supplement to the daily lessons.
For this lesson, the children completed a notebooking page about Creation. They each wrote what they felt was most important from their reading; then they colored the picture. Keaton also read the first chapter of Adam and His Kin by Ruth Beechick. (Kaylee was engrossed in another book at the time.)
This post contains affiliate links. If you click on an affiliate link and make a purchase, we will receive a small commission. See our Disclosure Policy for more information.

Day Two
Today’s lesson is about Adam and Eve. After reading the lesson silently, Kaylee and Keaton completed their notebooking pages. Keaton also read another chapter or two in Adam and His Kin.

Day Three
Today’s lesson is entitled “Jubal and Tubal-Cain.” Both kids were interested in learning more about these important but little-known Bible characters. After reading the lesson, each child completed a notebooking page with a summary of what he/she read. Keaton continued reading Adam and His Kin.

After completing the lesson on day three, students should make the memory cards for the previous three lessons. I have to confess that we have not gotten our memory cards started yet. I do believe that the continuous review is essential for reinforcing what has been learned, so we WILL be getting to these soon. Hold me to it, won’t you?
Day Four
After completing three lessons, it’s time for a review! The review activities consist primarily of updating the timeline and doing mapwork.

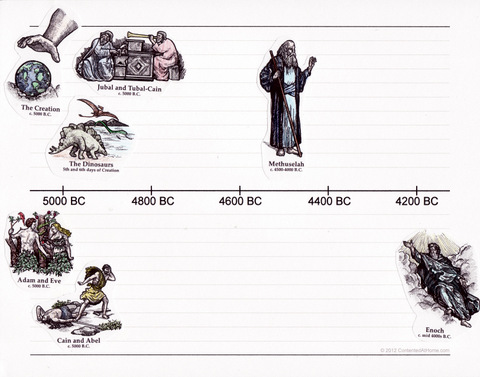
Kaylee and Keaton keep individual timeline notebooks. (I’ll be sharing more about the timeline notebooks in the next week or two.) Both children color timeline figures for the lessons they’ve covered earlier in the week. After coloring the figures, they cut out around them and use a scrapbook adhesive to adhere them to the timeline pages.
Download FREE timeline notebook pages to make your own timeline notebook!

Day Five
Day Five is used for cumulative review. Students complete either a quiz or a worksheet that reviews all the material they have studied since the beginning of the course.
**********************
I hope you’ve enjoyed taking a peek into how we use Mystery of History! We are truly loving our study of history this year. In fact, just a few days ago I heard Keaton say, “This is the best history I’ve ever had!” I don’t think I could praise it any more highly than that.

Thanks so much for the helpful tip! We will surely apply it to our homeschooling. Please keep it coming!
Thank you for the free download! I was wondering if you change the size of the figures or do you leave them the size they are?
Amanda, I used to use the full size (wall size) figures, but found that some pages got overcrowded. So now I print them out notebook size (from the CD), and they fit much better. If you are using the reproducible figures instead of the CD, you can shrink them a bit so they’ll print out smaller. Hope this helps!
Are they from the reproducibles CD? I love the look of them. I will be teaching MOH I to a coop class this fall and am trying to gather resources. I did not know where to get good timeline figures
We use the timeline figures from Homeschool in the Woods: http://www.homeschoolinthewoods.com/timelinefigures.html. They are the best that I have seen, but they are pricey. I have the CD, but the individual sets are a less expensive option.
MOH as a co-op class sounds like so much fun! I’m sure the students will enjoy it. 🙂
I’m hoping to start MOH this year. Thank you for posting examples of your children’s notebooking pages. They did a great job on them. Beautiful penmanship! How old were you children when they produced these notebooking pages? My girls are 1st grade and under so we’re just getting started and I could sure use a few pointers. How did you get them to this point of knowing how to write a summary of what they’ve read/heard? Was there a special method or curriculum you followed (or did you just know how to do it)? Thanks!
Hi Shawna,
I apologize for the delay in replying–our baby was born Dec. 19 and I’m still catching up. 🙂
My son was 11 when he completed the notebooking page in this post. I didn’t really follow any particular method or “rules.” Basically I asked him to write down the things that he felt were most important or most interesting. I tried to keep the requirements simple: full sentences with a capital letter and ending punctuation. (He hadn’t had much experience with writing when we began notebooking.)
I hope this helps you a little. Notebooking is a great learning tool!
HI,
I know I’m coming to this post quite late 🙂 I found it while googling MOH daily lesson plans. I am going to use this curriculum in the fall. I was wondering where you got your notebook pages? Also, do you have a list of read alouds that you liked? We are working on Volume 2 this year.
Thanks,
Heather
Hi Heather! I made the notebook pages in PowerPoint, using timeline figures from the Homeschool in the Woods timeline CD. Partway through the year I started using the ones from Bright Ideas Press, and we LOVED them! They actually have several formats, including one that uses questions/prompts to help kids get started. I can get you a link if you are interested.
As for reading, I looked but couldn’t find a list of the books we used. I think all of them were from the list in the MOH book. I remember that we read Adam & Eve, and Adara, and about a half dozen more. Not much help, I know! :/
Just came across this, and am wondering (since this is a few years old) if you have more updates of MOH? We are entering our second year of using it, and love to see others examples!
I’m sorry, Camille, but I DON’T have any further updates. MOH is still my favorite world history curriculum, and when we use it in the future, I will definitely be documenting it! 🙂
I have a question about the memory cards and the timeline. It seems to me that it’s repetitive to write a memory card and then use the same information to put on a timeline since the memory cards would all be in chronological order. Am I missing something?
We never actually wrote out the memory cards – the kids did notebooking instead. However, I do think they would be beneficial because they would ideally contain more information than the timeline entry would. Does that make sense? 🙂